HSH-Equipment
Good equipment is essential for work in hand with the HSH-method. A special schooling bridle with several devices that go with it has been developed through years of practising this method.
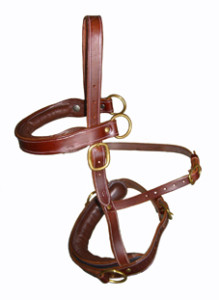
HSH schooling bridle for non-violent horse training
With the HSH schooling bridle the horse can be educated without using force. The trainer may have a clear influence on the horse without touching the mouth.
When the horse supports itself on the smooth noseband it doesn’t feel pain. The orders which are given to him are transposed onto the sensitive region of the head, but are not felt as punishment. All painful irritations in the mouth are avoided. With this the trainer gains the horse’s confidence rather quickly. The whole HSH schooling bridle is manufactured in a way that the horse can easily and joyfully learn without fearing pain.
All parts of the HSH schooling bridle are high quality and manufactured by hand. They are adapted to the needs of a schooling method of not using any violent means.
Equipment I: work in hand
All parts of the equipment can be purchased directly under “Products & Prices“!
The HSH schooling bridle – its details and functions
All parts of the HSH schooling bridle are high quality and manufactured by hand. They are adapted to the needs of a schooling method of not using any violent means.
Noseband padding
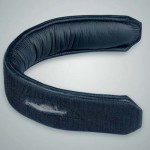
The cushioned noseband of the schooling bridle comes with additional upholstery material. The padding pannel at the backside of the bridle can be removed. Two little openings allow the addition or removal of padding according to the needs. The aim is to have a gentle influence without pressure on the horse; therefore the noseband has to be individually adapted to the form of the horse’s nose. The bridle must fit perfectly, be smooth and not hurting anywhere.
Noseband
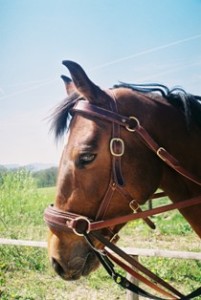
There is no longer an iron hinge on the schooling bridle as it is the case in traditional cavessons. The upper edge of the noseband schould lie two fingers underneath the cheekbone. In any case one has to make sure that the smooth part of the noseband is not under pressure.
Cheekband
This prevents the noseband from turning round. In order to do this it must be fixed at the inferior part of the chin. It has to be fixed tightly otherwise the eyes risk being touched and hurt which is the case when you lunge a horse only with a holster.
Browband
The headband is rather broad so that at an advanced stage of training the rings at its side can be used for the top reins. But be cautious! Don’t use this way of fixing the reins before the horse has acquired weight-bearing capacity and learned to bend the haunches.
Furthermore the following parts of the equipment are necessary to apply the HSH method correctly:
Top reins and lower reins

top reins and lower reins, they come in black or chestnut, the colours are just to make them more visible (klick to enlarge)
The lower reins are tied to the saddle; they go through the front legs and lead to the side rings of the schooling bridle. They are passed through from inside to outside and the end is fixed in the rein brackets. The lower reins determine the degree of flexion of the head and give the horse the opportunity to move the head up and down a bit – a big relief for the horse. The top reins are passed through the lateral rings and later on when elevation is asked in the side rings of the browband. On the other end the reins are adjusted at the rein brackets.
Important: Artificial breaking points
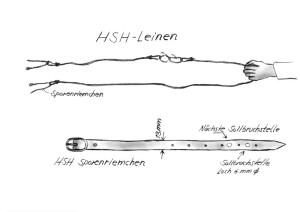
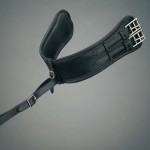
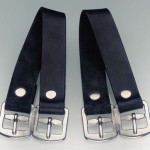
In case the horse is falling when you work with the HSH method the reins should break at the artificial breaking point. For this reason the top and lower reins are combined with a weakened little strap. Instead of using a heavy snap link take leather spur straps, make their holes a little bigger so that they will break more easily. (Two little holes side by side are sufficient.) Textile strap are of no use as they don’t tear. The lower reins are buckled with a spur strap which goes around the girth. The advantage is that by this way you can easily change from work in hand to riding – you don’t have to loosen the girth.
The artificial breaking points are especially important in the leads. It can never be excluded that a horse runs away. In that case it is necessary that the leads that might go around the horse’s or the trainer’s leg break. The leads normally available in shops are extremely tear-proof so that there is the risk that sever accidents might happen. The artificial breaking points should be placed directly at the rings of the schooling bridle or the snaffle.
Rein brackets
The horse should be saddled when you work in hand with the HSH method so that with the time the saddle finds its correct place on the back. The top and lower reins must be fixed at the saddle with the help of rein brackets. They are hung in the place where the stirrups normally are.
Long leads
They should differ in length so that the “artificial breaking point” created by spur straps which are weakened by additional holes doesn’t end up right in the middle. This would not be comfortable when handling the leads. The ends of both leads are formed into a small loop where the spurstraps can just be buckled.
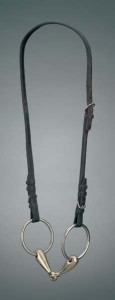
Blind bit
I recommend using the snaffle bit already during work in hand so that the horse gets used to it. It is combined with the schooling bridle. First take on the snaffle – merely the bit hold by a simple strap – and then the schooling bridle. Only for safety reason in case of a dangerous situation the leads are fixed at the snaffle bit.
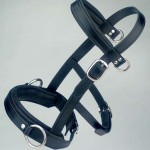
HSH-equipement in two colours and different size!
The HSH-equipement – padded cavesson, upper reins, lower reins and rein brackets – are now available also in brown and in two different sizes. We are also working on cavesson size for ponies. The brown leather is very smooth, the rings and buckles look very elegant! For further information see products.
